Tectia
RDHPCS users with a CAC who are logging in from a Windows, Mac, or Linux workstation/laptop are required to use CAC login. Access to RDHPCS resources via CAC requires a CAC reader and necessary software. The Tectia SSH Client software has been selected to meet the remote CAC login requirements for the RDHPCS program. Two licenses have been purchased for each RDHPCS user.
The following features are supported:
Port forwarding
X11 tunneling
Access to RDHPCS Systems from a system which cannot directly access a user’s CAC is not supported.
Tectia Initial Setup procedure
SSH Tectia Client provides secure terminal client functionality for remote users and system administrators for accessing remote hosts running SSH Tectia Server or other Secure Shell server.
Locate the CAC-bastion hostname you need in the Bastion Hostnames table.
The OS-specific tabs (Windows, Linux, MAC) in the Install the Tectia Client section describe how to do the following:
Download the Tectia software
Install the Tectia software on your local laptop or workstation
Install the license file on your local laptop or workstation
Configure the Tectia software
Use the client software to connect to R&D HPC Systems
Set up port tunneling
Locate the CAC-bastion hostname you need in the Bastion Hostnames table. Then follow the instructions for your operating system.
Note
Users will likely need to contact their local IT Help Desk to download and install Tectia.
Requirements
You must have current CAC information in AIM for the Tectia CAC logon to work. To confirm that your CAC information is correct authenticate using your CAC in AIM. If your CAC information has been refreshed, wait 15 minutes before attempting to log in using Tectia.
In order to install the Tectia SSH Client, you must have the necessary administrator privileges on your system. If you do not have this access, contact your IT system administrator for assistance.
The Tectia Client installation requires about 140 megabytes of disk space and your system must have a CAC reader.
Install the Tectia Client
The Windows installation package is provided in the MSI (Microsoft Installer) format. The same package is compatible with the supported 32-bit (x86) and the 64-bit (x64) versions of Microsoft Windows. Time to complete is approximately 10 minutes.
Download the Tectia client.
Follow the Tectia client link to open new tab on your browser. You may have to authenticate using your NOAA email and password.
Once you have authenticated and the folder is shown in your browser, select
tectia-client-<version>*-windows*.zipSelect one of the .msi packages for 32-bit (x86) or 64-bit (x86-64) machines.
Extract the installation zip file contents to a temporary location. The download package includes Tectia documentation .pdf files that can be used after the basic install described here to learn more, customize, etc. Please review this documentation before requesting help beyond the scope of this basic setup procedure.
Please note that the zip file also includes the license file named
stc??.dat, which will need to copied to the appropriate place as mentioned in a later step.Locate the Windows Installer file:
ssh-tectia-client-<version>-windows.msifor 32-bit Windows systems.ssh-tectia-client-<version>-windows_64.msifor 64-bit Windows systems.
Where
<version>corresponds to the version and build number, for example6.4.10.123. On some Windows versions, the.msifile extension is not shown for the installer file.Double-click the installation file, and the installation wizard will start.
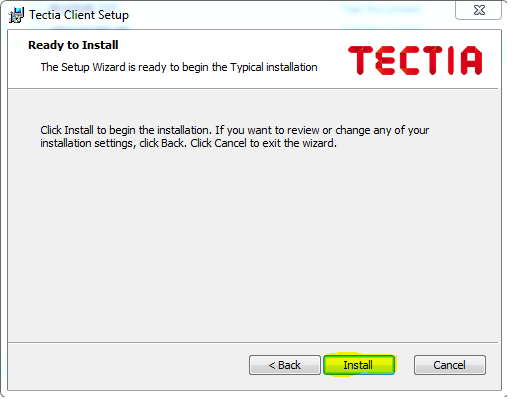
Select Typical and click Next.

Click Install.
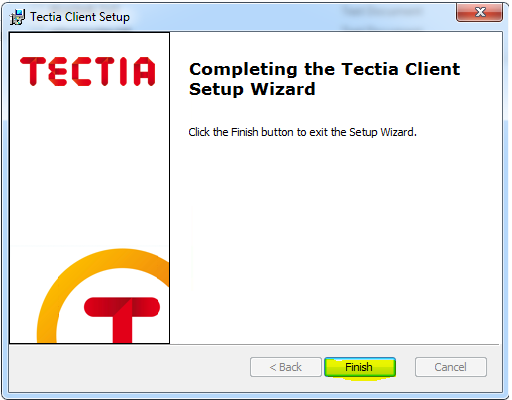
When the client is fully installed, click Finish.
You will now see two icons on your desktop. One is named “Tectia – SSH Terminal” and the second one is named “Tectia – Secure File Transfer.
Reboot your computer.
Find and install the Tectia license that is available in the tar file as mentioned in step 2 above. Copy the license file
stc??.datto the appropriate location as described below:Copy the license file
stc??.datto the appropriate location as described below:64-bit Windows versions:
C:\Program Files (x86)\SSH Communications Security\SSH Tectia\SSH Tectia AUX\licenses
32-bit Windows versions
C:\Program Files\SSH Communications Security\SSH Tectia\SSH Tectia AUX\licenses
Note
Tectia SSH will install on RHEL-based Linux systems, e.g., RHEL, Centos, Fedora, Rocky Linux
Note
The Tectia client uses Coolkey to access the certificates on your CAC. Coolkey should be available in your distribution.
$ sudo yum install coolkey
Once Coolkey is installed you will need to know the full path
to the library, for example /usr/lib/pkcs11/libcoolkeypk11.so
Download the Tectia client.
Follow the Tectia client link to open new tab on your browser. You may have to authenticate using your NOAA email and password.
Once you have authenticated and the file is shown in your browser, click on the appropriate file.
Expand the archive.
$ tar xf tectia-client-*-linux-x86_64*.tar
Note
The download package includes Tectia documentation .pdf files that you can use after the basic install described here to learn more, customize, etc. Please review this documentation before requesting help beyond the scope of this basic setup procedure.
Note
Please note that tar file also include the license file named
stc??.dat, which should be copied to the appropriate place as mentioned in a later step.Change into the client directory.
$ cd tectia-client-6.4.13.36-linux-x86_64-upgrd-eval/
Run the installer
$ rpm -i *.rpm
Modify Path
The Tectia client is installed in
/opt/tectia/. It is advisable to add the binary directory to your path.If your default shell is bash, you can add the following to your
~/.profilefile.if [ -d "/opt/tectia/bin" ] ; then export PATH="$PATH:/opt/tectia/bin" fi if [ -d "/opt/tectia/man" ] ; then export MANPATH="$MANPATH:/opt/tectia/man" fi
If your default shell is csh, you need to edit your
~/.cshrcfile.if ( -d "/opt/tectia/bin" ) ; then setenv PATH "$PATH:/opt/tectia/bin" endif if ( -d "/opt/tectia/man" ) ; then setenv MANPATH "$MANPATH:/opt/tectia/man" endif
Find and install the Tectia license, available in tar file described in step 2. Copy the license file
stc??.datto the appropriate location as follows:$ mkdir /etc/ssh2/licenses/ $ cp stc64.dat /etc/ssh2/licenses/
The Mac installation package includes installers for both the Tectia software and the license.
Follow the Tectia client link to open new tab on your browser. You may have to authenticate using your NOAA email and password. Once you have authenticated and the file is shown in your browser, click “Download.”
Locate the packages under your Downloads folder
SshTectiaClient-<version>.pkg, where<version>corresponds to the version and build number, for example 6.5.0.1087).Double-click the box icon to the right of the package name to start the installation wizard.
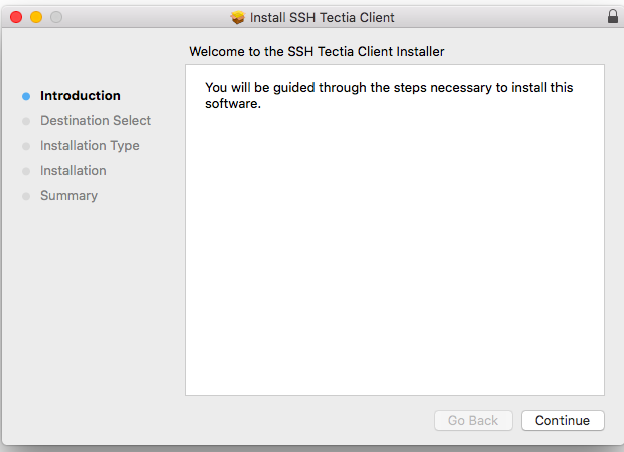
Click continue. The Wizard lets you specify the destination and installation type. Click “Continue” to accept the destination and standard installation, then click “Install”.
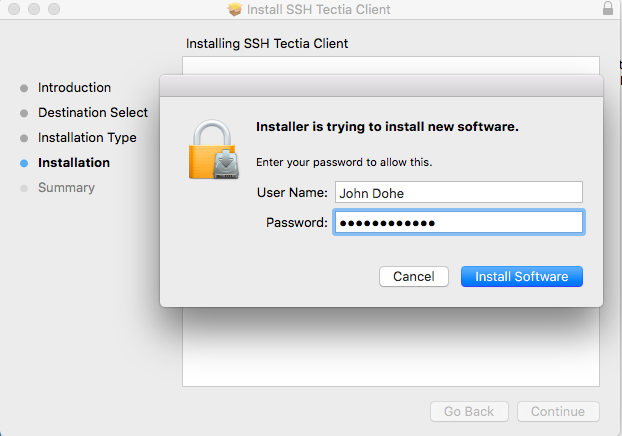
Enter the password for your desktop/laptop login and click “Install Software”. You’ll see a confirmation message when the installation is complete.
Reboot your computer.
The Tectia software you just installed requires a new license and once installed, works for all RDHPCS logons. To request a license, please email ONE help request to the help desk of the system you use the most. Please use the subject “Tectia Mac license request”.
Download the license file.
Locate the packages under your Downloads folder
ssh-tectia-client-license-<version>.pkg, where<version>corresponds to the version and build number, for example 6.5.0.1087).Double-click the box icon to the right of the package name and the installation wizard will start.
Repeat the installation steps above until you get “The installation was successful” message.
Configure the Tectia Client
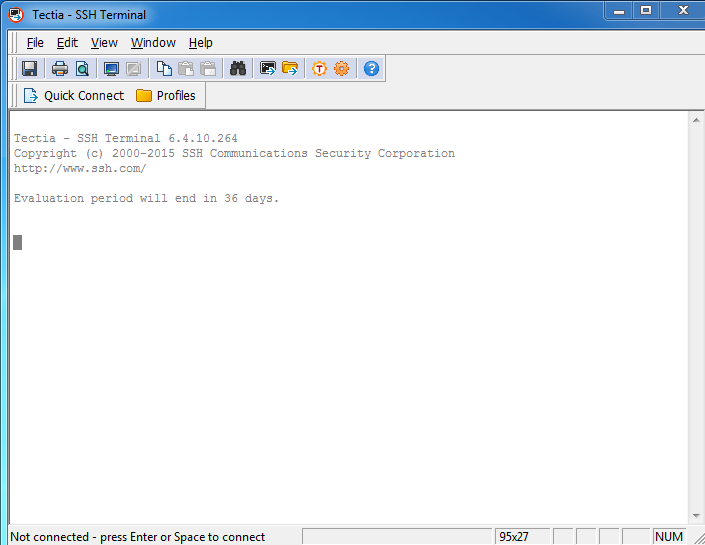
Double-click the “Tectia – SSH Terminal” icon on your desktop. The following screen appears:
In the menu bar, select “Edit” > “Tectia Connections”.
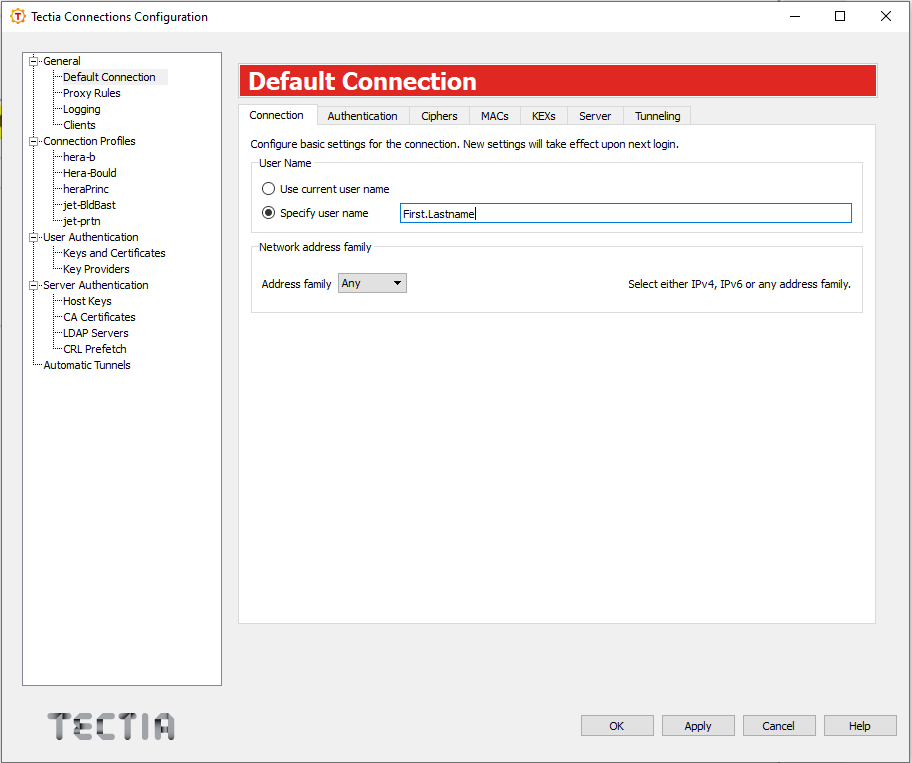
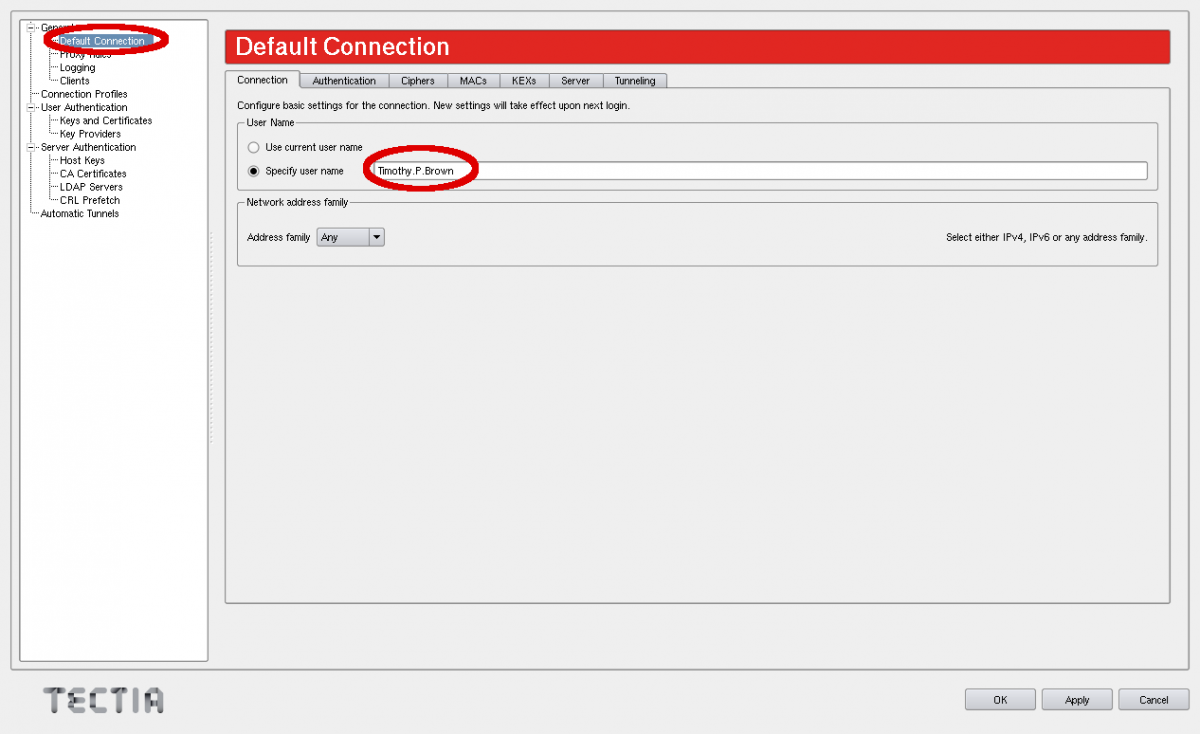
Set your default username
In the sidebar menu select “General” > “Default Connection”
In the default “Connection” tab select “Specify user name”, and enter your user name, which must match your NOAA Email user name in AIM. The user name is case sensitive, and should be in the form of “Firstname.Lastname” or “Firstname.M.Lastname” (ex: John.Smith, John.P.Smith). Do not include the @noaa.gov.
Select “Apply”
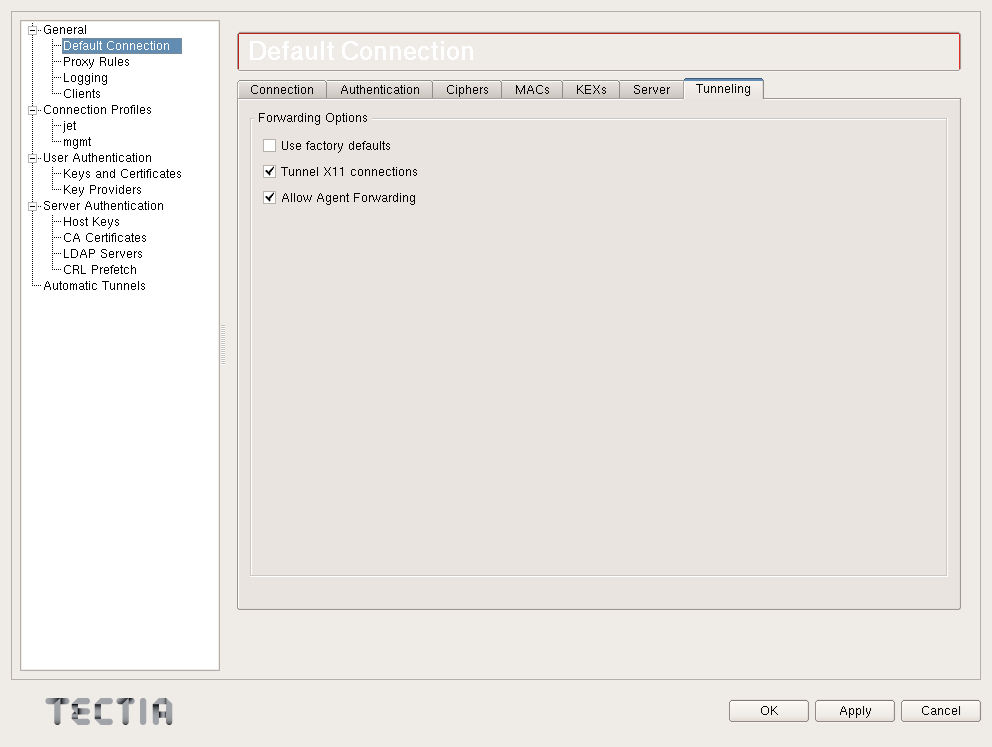
Optional: Set X windows forwarding
Select the “Tunneling” tab.
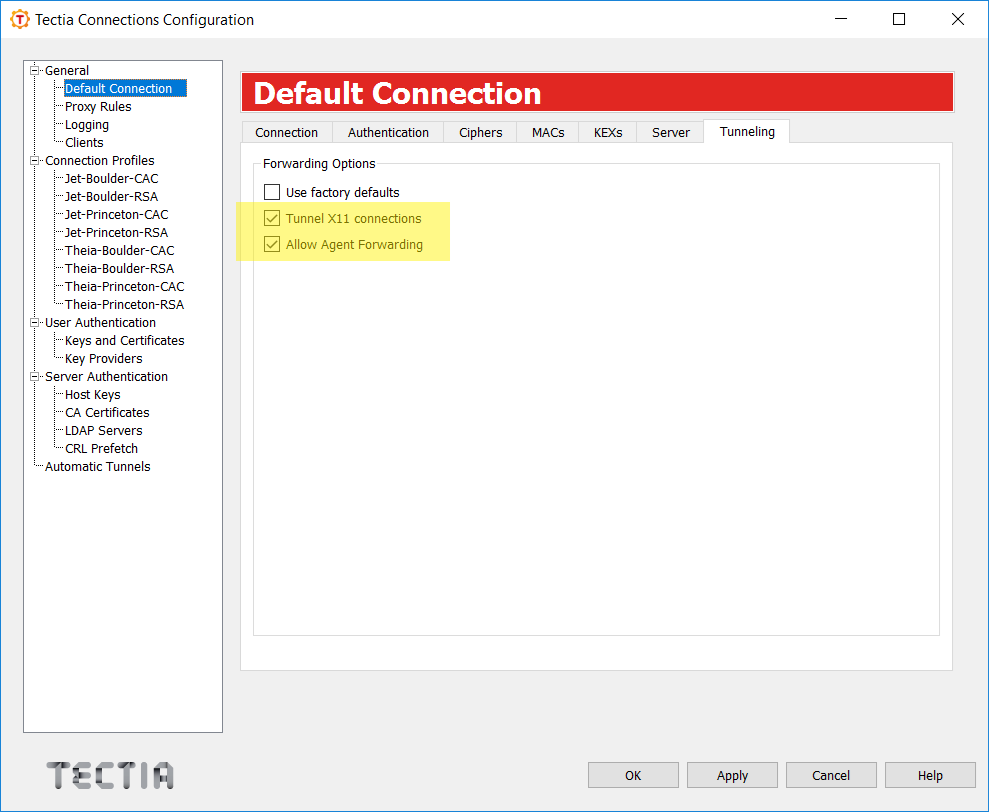
Check the two boxes as illustrated, and click “Apply”.
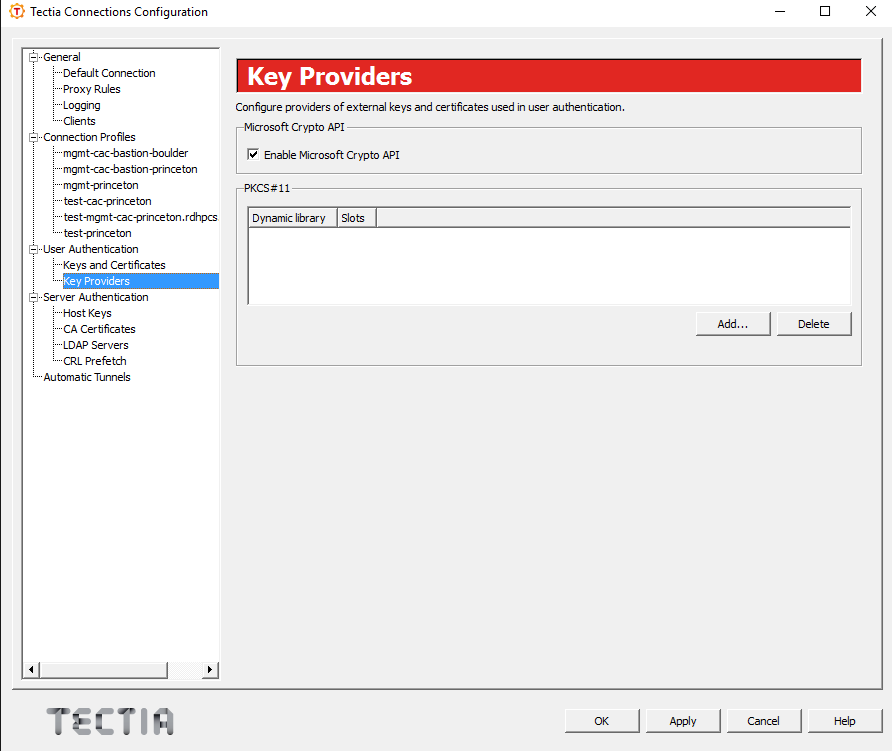
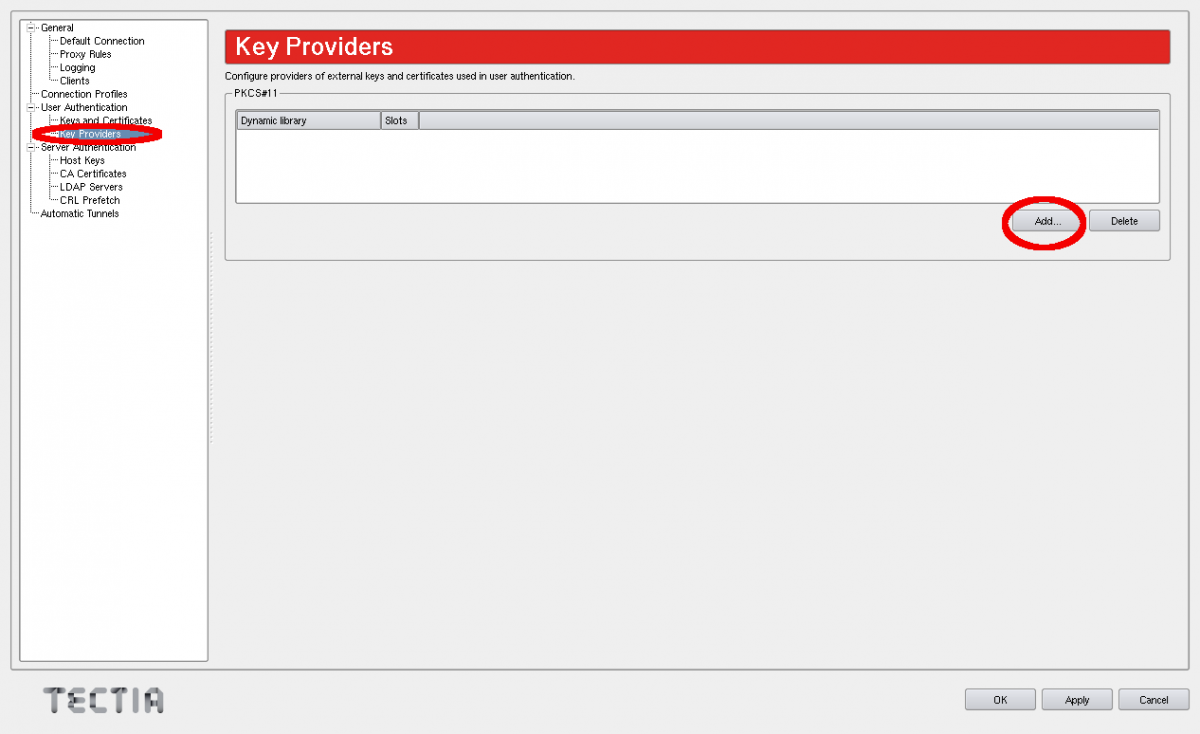
In the sidebar menu:
Select “User Authentication” > “Key Providers” .
Select the “Enable Microsoft Crypto API” check box. This is needed to view your CAC card certificates.
Select “Apply”
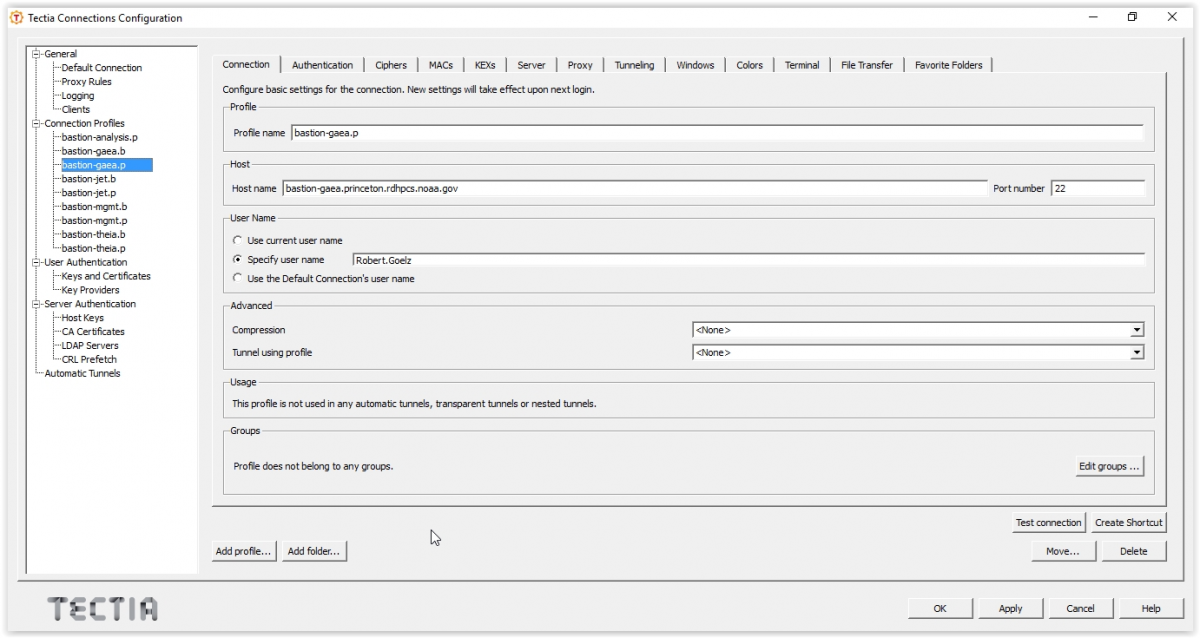
Set up a connection profile for each hostname that you want to use. There are two bastions, one in Boulder, CO and one in Princeton, NJ. It is highly recommended that you set up a profile from each bastion for each RDHPCS system you need to use, as bastions are typically down during maintenance periods.
In the sidebar menu select “Connection Profiles”.
Select “Add Profile”.
In the “Connection” tab: Fill out the information for the hostname you are configuring. * Enter the “Profile Name” you want to assign to the hostname (ex: Jet-BLDR bastion). Leave “Port number” =22.
Enter the Host Name from the bastion list.
Select “Apply”.
To add another profile select “Add Profile” in the lower left, and repeat the above steps.
Select “OK” when all profiles are set.
The example below shows a profile for the CAC Gaea bastion in Princeton. The port used (22) is correct, as is the User Name selection. This can be set here, or just select the radio button next to “Use the Default Connection’s username”.
Tectia stores its configuration in
${HOME}/.ssh2/ssh-broker-config.xml. It is recommended to
use the graphical configuration tool, ssh-tectia-configuration.
Launch the configuration client (ssh-tectia-configuration).
In the Default Connection item, set a default user name.
Enable X11 Forwarding
Add a PKCS 11 library under the “Key Providers” item and click on the “Add” button.
Add the full path to the Coolkey library. It should be
/usr/lib64/pkcs11/libcoolkeypk11.so.

Check to make sure this is the correct location.
Confirm that the PKCS 11 key providers contains the Coolkey library.
Under “Connection Profiles, add a new connection profile.
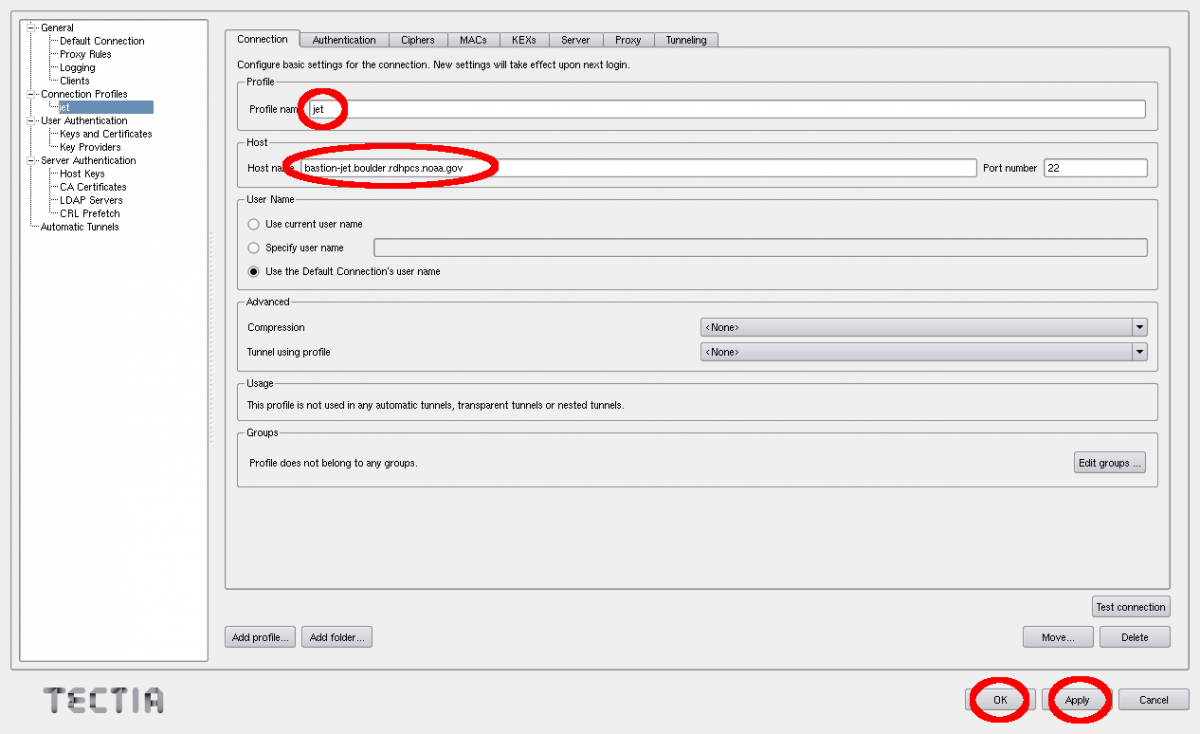
Set a profile name, for example “jet”.
Set the full hostname, for example bastion-jet.boulder.rdhpcs.noaa.gov.
Apply the changes and then click OK.
Using the Tectia SSH Client
Once Tectia has been configured and the binary directory has been added to your path. You can ssh into to Jet using your CAC. The Tectia ssh command is
sshg3.
In a terminal window type
sshg3 jetwhere jet is the name of the connection profile created under step 5 of the configuration.You will be prompted to save and accept a key for this bastion. Then type “save”.
Once the key is accepted you will be prompted for your CAC Pin (“Passphrase for the private key:”); Please note that the prompt is very misleading! It is not asking for your “pass phrase for the certificate” (which the 3 word that you use to renew your certificate)!
If successful you will see the message “Authentication successful.” and you will be forwarded to a front-end host.
Tectia stores its configuration in
${HOME}/.ssh2/ssh-broker-config.xml. It is recommended to
use the graphical configuration tool,
ssh-tectia-configuration.
Launch the configuration client (
ssh-tectia-configuration) or from the Applications directory (/Applications/SshTectiaClient)
Set a default username under the “Default Connection” item. This should be your case sensitive NOAA RDHPCS login username.
Enable X11 Forwarding
If no Key Provider is specified (if the Dynamic Library list is blank), add a PKCS 11 library under the “Key Providers” item.
Click the “Add” button.
Select “Browse.” This should pull up the full path to the opensc-pkcs11 library.
The full path is
/Applications/SshTectiaClient.app/Contents/PlugIns/OpenSC/opensc-pkcs11.so.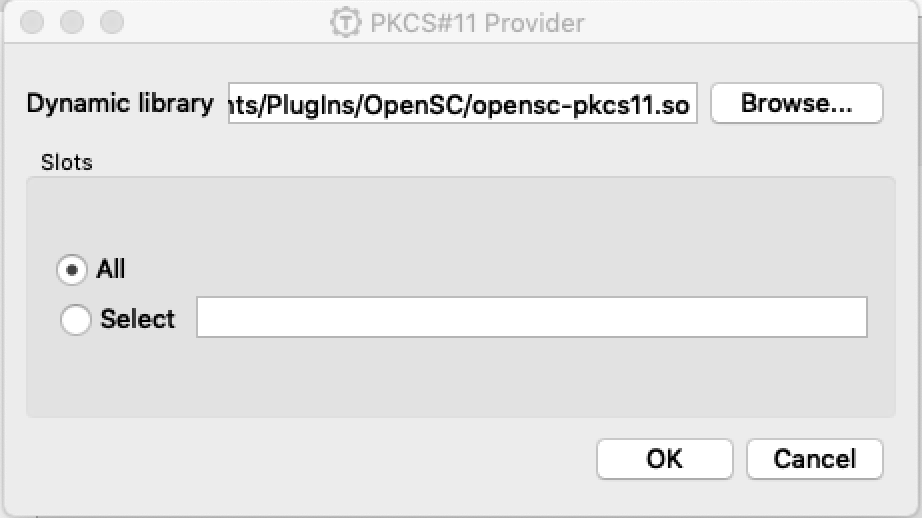
Please check to make sure this is the correct location.
Under “Connection Profiles, add a new connection profile.
Set a profile name, for example “jet”.
Set the full hostname, for example “bastion-jet.boulder.rdhpcs.noaa.gov”.
Apply the changes and then click OK.
Once the Tectia Client has been configured, you can connect to any of the following CAC bastions.
Using the Tectia SSH Client
Once Tectia has been configured and the binary directory has been added to your path, you can ssh into to any RDHPCS system using your CAC with the
sshg3command.
With the CAC card inserted in the reader, in a terminal window type “sshg3 jet” where “jet” is the name of the connection profile created under step 5 of the configuration.
You will be prompted to save and accept the key for this bastion. You need to type “save”.
Once the key is accepted you will be prompted for your CAC Pin.
Note
The prompt for the CAC reads: “Passphrase for the private key:”; and the prompt is very misleading! It is not asking for your “passphrase for the certificate” (the 3 words that you use to renew your certificate)!’’’
If successful you will see the message “Authentication successful.” You will be forwarded to a front-end host.
Port Tunnelling
If you plan to do file transfers from non-NOAA domains, or if you plan to use remote Desktop features (such as X2Go), you will have to set port forwarding for each profile. Please keep in mind that different bastions use different port numbers. Log in to each specific host to make sure you have your correct port number.
Select the “Tunneling” Tab
Select “Use Defaults” so that it will use the X11 forwarding setting that is set in Default Setting
Select the “Add” button
In the steps below, replace “12345” with the unique local port number assigned to you when you login to Jet. Port numbers are dependent on the host you are trying to connect.
“Type”= TCP
“Listen Port”= 12345
Select “Allow local connections only”
“Destination host”=localhost
“Destination port”= 12345
Click “OK”. This will populate the “Local Tunnels” tab in the configuration window:

Click “Apply” to save the profile
Repeat these steps for each profile you create.
Set Up Port Tunnelling
Complete the following sequence to set up port tunnelling.
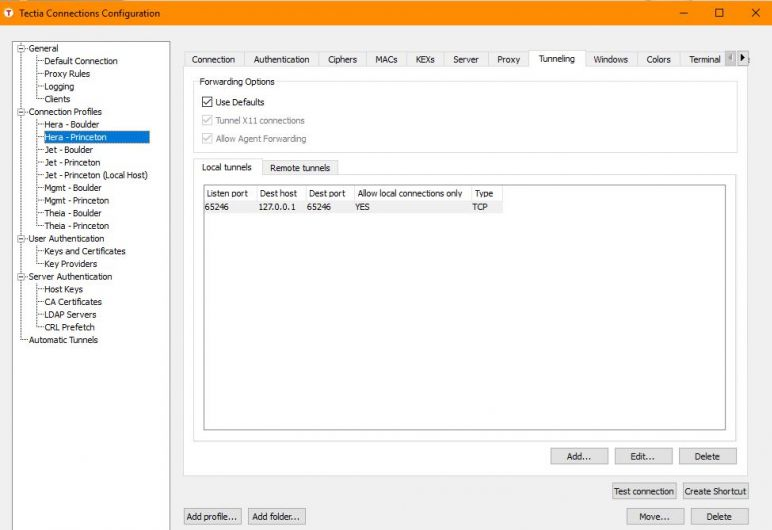
Edit your connection profile. Navigate to the “Tunneling” tab.

Check “Use Defaults”. Tunnel X11 connections” and “Allow Agent Forwarding” should be checked. If not, check them.

Select “Add”.
Select “TCP” for Type
Listen Port should match your Local port number listed on your session login.
Check “Allow local connections only”
Destination host: 127.0.0.1
Destination Port should match your Local port number listed on your session login.
Select “OK”
Selecting “Test connection” to test.
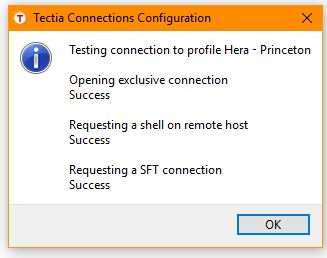
Completed configuration should look like the following:
Once the session is open, you will be able to use this forwarded port for data transfers as long as this ssh window is kept open. After the first session has been opened with the port forwarding, any further connections (login via ssh, copy via scp) will work as expected.
Testing Port Tunnels
Once you have set up port tunneling, it’s useful test that the tunnel has been established correctly.
To do this, after the port tunnel has been established, try to login using the local host and port combination. Please keep in mind you will have to use YubiKey Multi-Factor authentication for this test. You should try to connect using the following settings with your ssh client (with Windows you could use a client like putty, and with linux/Mac you should use ssh):
Host: localhost (This is literal string, that is, enter the word “localhost”)
Port: Your-assigned-local-port-on-hera-jet (This is the number listed as Local Port when you login)
User: Your user name
When prompted, enter your User Name and Password, and authenticate with YubiKey. If you’re able to login successfully and see your home directory, that confirms that your port tunneling is correct.